Meteor Shower Video Creation Tutorial [English]
WORK IN PROGRESS!!
This web page briefly describes the main steps to create a video of a meteor shower. It does not pretend to be a complete manual but just hints about how to do the main steps to create a video like this one:
- Take Pictures: Some advices: Depending on the background light the exposures could be longer or shorter. Exposures between 10 and 30 seconds can be a good starting point. Use a high aperture ad wide angle lens. Remember to shoot when the radiant is over the horizon. It is the only moment when there will be meteors. If possible, use RAW.
- Develop your photographs: I use RawTherapee. Be careful with noise and white balance (I like temperatures around 3500K for night photographs). I develop the photographs at full resolution (there will be time to re-scale them). However, it is a good moment to crop / rotate them if you were not careful enough at exposure taken time.
- Create a first Time-Lapse: Just to have an impression on how the video will look like. To do so I use
ffmpegfrom the terminal:> ffmpeg -r 24 -f image2 -start_number 2045 -i 0R7A%04d.jpg -vcodec libx264 -crf 25 -pix_fmt yuv420p -vf scale=1620:1080 video.mp4
where:
-r 24: 24 frames per second-f image2: use static images as source for the video-start_numer 2045: start at image number 2045 (the first one in my sequence)-i 0R7A%04d.jpg: the name of the images.%04dwill be transformed into 0 left padded numbers with 4 digits. So the first image that it will use would be0R7A2045.jpg.-vcodec libx264 -crf 25 -pix_fmt yuv420p: Additional codec and format parameters.-vf scale=1620:1080: Size of the resulting video (near to HD size)video.mp4: Name of the resulting video
Using that code we got something like this:
- Select frames with meteors: carefully inspect all your frames and copy the files with meteors to a folder named
meteors. Take care not selecting other objects like satellites or planes: if it appears in more than 2 frames it is not a meteor. If it appears in 2 frames it might be a meteor. They usually look like a thin line which becomes thinner in its extrems. Some of them might be very faint and small. Comparing the previous frame with the current one is the easiest way to get them. I use Gwenview to blink the files and get them. Yes, this is one of the first hard steps. - Extract the meteors from each one of the previously selected frames:
- Using Gimp
File->Open...a frame that does not contain any meteor. File->Open as Layers...the frames with meteors. If there are many images with meteors (lucky you!!) do not open all the images as your computer may run out of memory. You can do this process grouping your frames. In theLayerspanel (Windows->Dockable Dialogs->Layers)you should see all your frames stacked with the one of the preovious step at the bottom:

- Hide all layers above the first one turning the
eye iconoff in theLayerspanel, so you will see the first image (the one without meteors):

- Turn the visibility of the first meteor image on (
eye icon) and zoom the meteor to see it clearly.Right click on layer name->Add layer mask...->White (full opacity). A white square appears right to the layer miniature. Make sure you click on that square (the white border will be on the mask miniature, not the image miniature) as we are going to work in the layer mask, not the layer itself:
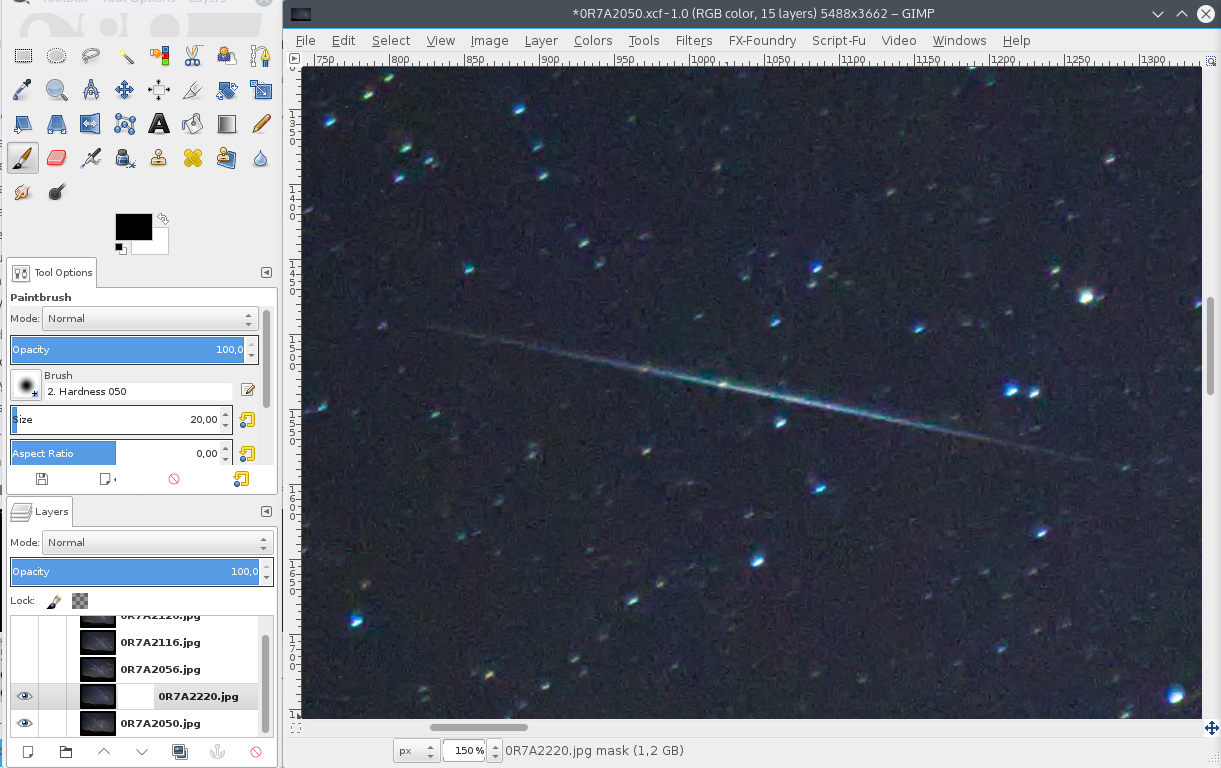
- Use the
Paintbrush toolfrom yourToolbox. Make sure you useblackas primary color and an appropiate toolsizeandhardness(17and25respectively might be a good starting point). Just hand draw over your meteor. It should "disappear" letting the below image pixels show. You can show your layer mask withRight click on layer mask miniature->Show layer mask:

- Invert the colors in the layer mask (
Colors->Invert) and, if necessary, blur the mask a little bit to avoid edge artifacts (Filters->Blur->Gaussian Blur). Experiment with the parameters and hide the layer mask to see the resultsRight click on layer mask miniature->Show layer mask. You show see your original image with the meteor of the second image overlaped. Play with theeye icon, thepaintbrushandbluruntil you get a good result:
- Save your image to avoid data loss (
File->Save). - Repeat steps 5.d to 5.g for every one of your meteors in your frames.
- Using Gimp
Last update: May 7th, 2019